
Over the years, I’ve had to whip up quite a few Visio diagrams. I used to spend a long time fiddling with different shapes and formatting, but not getting anything done. These days I have a three-step process that helps me crank out diagrams to communicate ideas. The diagrams won’t be the type you’ll include in product literature, nor will they win awards for innovation, but they are perfect to hang on the wall for a few weeks while a team is turning ideas into working software.
By the time I’ve reached Step 1, I have an idea of what I want to communicate in the drawing. For instance, I’ll know I want to show how account data comes into Service Foo (which is hosted in Process Bar) and runs through a series of pipes and filters.
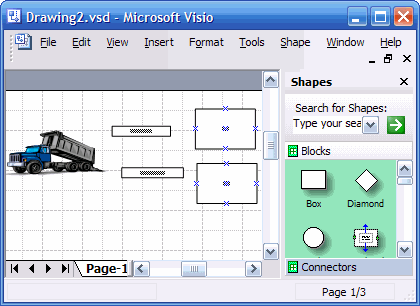
I’ll create a blank drawing and open only the “Blocks” and “Connectors” shapes. In the File -> Shapes menu, these shapes are under “Block Diagrams” and “Visio Extras”. The other 3 bazillion shapes in Visio can be distracting, and keeping just boxes, circles, and arrows on hand helps me to focus.
The goal of Step 1 is to drag a shape into the drawing for each thing in the idea I need to communicate. I’ll add text to the shapes, but I don’t worry about connectors, arrows, colors, formatting, or precise positioning. That’s all fluff that comes later. By sticking to the basics, I’ll only spend 5 minutes dragging and dropping instead of 25 minutes debating the various aesthetics of the “Reference Callout 1” shape versus the “Reference Callout 2” shape.
This diagram I’m working on has four boxes and a dump truck. Yes, I broke my own rules by adding clip art. The art only took an extra 10 seconds thanks to the clip art “search for” feature, and I’ll justify it later. I now have a diagram with all the “things” I need to manipulate.
Tomorrow evening we will take the diagram through step 2.

 OdeToCode by K. Scott Allen
 Subscribe
 Twitter
 Search
 About
About
 Learn C#